Tuesday, July 31, 2007

Cutting scrapbooking titles by hand

It may sound a bit weird, but I actually enjoy cutting the odd title or letter, by hand! That doesn’t stop me planning on investing on a Craft Robo however! LOL!

Knives
I have already mentioned, in a previous post Essential Tools for Scrapbooking Part 2, that I use a scalpel, and that the reason for this is I find it easier to grip and (like holding a pen) and the point of the blade is more like the nib of a pen to me.

So I find cutting an intricate title much easier with this tool. But of course it is what you are used to – I have been using the same scalpel (with replacement blades of course, LOL!) for nigh on 18 years!

Cutting TIPS
Because of the nature of a title, ie, there are lots of twists and turns to cut, there are a couple of things that make cutting a lot easier.

First – don’t place your work on a normal cutting mat! Use a glass cutting board. I use the back of a glass kitchen chopping board. The front is textured and so useless, but the back does just fine.

Second – Turn the paper as you cut. Your knife should basically stay in the same position, moving only slightly, and your other hand should be moving the paper or card around, so make sure your work surface is clear of obstructions – especially if you are cutting from a 12x12 sheet.

There are various ways of placing your cutting outline onto the paper or cardstock:

1. print out the text and trace onto the card stock using carbon paper, if you can reverse the text before printing, so much the better.

2. freehand draw

3. if it will go through your printer then, obviously, print directly on to the paper, again if 
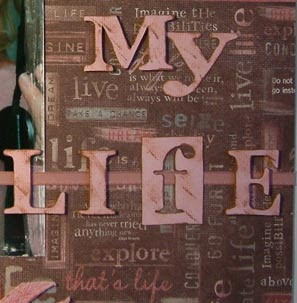
you can reverse the text then print onto the back side of your chosen paper.

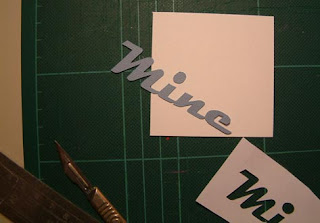
4. My quicker way (but possibly more difficult for cutting) is to just print the title onto ordinary white paper, tape it to the cardstock and cut through that and the cardstock. As you are going through 2 layers, you definitely need a sharp blade!

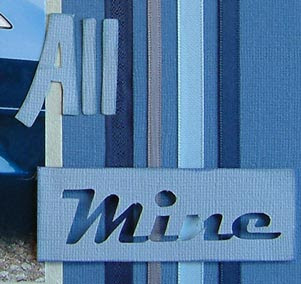
Useful TIP: I don’t like my hard work to go to waste, so when I am cutting out letters and titles I like to place them on the paper/cardstock with a decent margin around them. This means that if I cut really carefully, I get the use of the positive and the negative image. And I keep the unused one for another layout. If it’s the wrong colour, I can just recolour it!

Sunday, July 29, 2007

Nature's Beauty

I have seen one of these before, but it was only on Friday, when rushing around Tescos that I came across a small box of them for sale... what is it...?

It's a dragon fruit! It wasn't cheap £1.99 each - but I just thought it was sooooooooooooooo beautiful! Just look at those colours. The colour combinations... would you have thought of putting these colours together in a layout? No neither would I, but nature puts such combinations together all the time and they just work!

I just had to share this with you... I am in awe of nature's beauty, that's why I love television programs such as "Survival" and David Attenborough's plethora of nature programs.

I decided it would be a good opportunity to try such a fruit as my sister, bother in law and my two nieces were staying with us this weekend and we all agreed that it was a fascinating fruit to look at both inside and out.

As for the taste... well frankly it didn't have one!!! Funny isn't it, almost like nature put so much energy into making something so beautiful to the eye, that it ran out of oomph when it came to t
antalising the taste buds!


Anyway, my little one had a taste... she said "mmmmm" but I suspect it was for effect! Don't think she'll be asking for "more please mummy"!

I just wanted to look at it all the time!


Above left and right: Honey sampling the delights of said Dragon Fruit

above right: her cousin Mea who, at the tender age of 6, already knew what a Dragon Fruit was!!


UPDATE: 16th August 2008
I found another scrapper who "experimented" with a dragon fruit!! It's
Jak here in England!
Click here to see the entry in her blog.

Saturday, July 28, 2007

Essential Tools for Scrapbooking – Number 2

Scalpel and Steel Rule

Continuing the “Essential Tools” series of blog posts here I want to extol the virtues of my scalpel and steel rule.

Mundane you may think… but at the end of the day, they are very simple, but effective tools of the trade.

I have always used a scalpel myself, but you could lump any suitably sharp craft knife into this category. I just prefer my scalpel because I tend to hold it as if holding a pen, especially for precision cutting around letters, etc, whereas the more bulky craft knives have to be held differently.

Now I know most of you out there have paper trimmers and guillotines and indeed, so do I, but you can’t beat the precision of an extremely sharp blade running down the side of a steel rule to give a really crisp cut.

Now, we shouldn’t forget the cutting surface of course! I have found an A3 sized cutting mat the most useful. A4 is just too small and A2 is too big for most tables/desks.

Useful TIP… the “self healing” cutting mats are great for almost everything, but if you want to cut an intricate design, for instance a title, then use a glass cutting mat.

No… don’t go and buy something special, I use the back of a glass chopping board! I found it absolutely useless (not to mention very noisy) as a chopping board, but it’s fantastic for cutting round corners, etc!

The blade of your knife doesn’t sink in to the glass mat as it does with a self healing mat (ideal for steadying the blade for straight lines) and it’s this that allows you to swivel the paper easily as you cut. It does blunt the blade more quickly, but it’s worth it when you achieve a lovely title with nice crisp edges!

Thursday, July 26, 2007

Essential Tools for Scrapbooking – Number 1

We all talk of stash… the huge mountain of stuff we have acquired since we began to scrapbook. The reference is usually referring to papers and embellishments is it not?

Sometimes it includes the odd “special tool” but stash mostly refers to our lovely bits and pieces that make the visual experience we like to call a Scrapbooking Layout.

Well we often overlook and frankly, take for granted, our trusty tools – those tools that we use every day without thinking about them. So I have decided to dedicate a little blogging space to discuss these various bits of essential equipment and I am starting with my trusty…

pH Tester pen

Oh how that has come in handy over and over again. Now if you are like me and feels it’s all part and parcel of crafting to find the bargain alternatives to the “official” supplies, then you too will have delved into the depths of various non-scrapbooking supply shops and found little gems of possible scrapbooking embellishments and papers or cardstock.

Or, even better, have found various bits that you already have in the house.

The pH tester pen comes into it’s own for the budget scrapper. There have been many a material that I have thought worthy of adhering to my scrapbooking layout, only to whip out my pH pen and watch the colour go from purple (which means it’s not acid) to transparent (which means it is VERY acidic) in a split second! “Blink and you miss it” sort of thing!

“Woah,” I say to myself, “can’t use that then!” Which isn’t strictly true, because if it is a particularly attractive piece of paper or something, then I decide to use it on a greetings card instead - not as much longevity in their lifetime is there?!

An eye opener for me was the item in which I was storing my paper and various other “flat” items. This was an expanding file. It was foolscap size and was brilliant because I could put all my paper in there (12x12 included) separated into one colour for each section. I could pull it out to sit on the desktop for easy access when in use, but I could also squeeze it together to a reasonable width to transport to a crop. By the way, I like the fact that the paper sticks out above the top of the container because it’s much easier to flick through the contents – with a 12x12 paper container you have to keep lifting everything up slightly to view it.

Anyway, I digress…

The storage solution was great apart from one thing……it was made of paper (Manilla), and yes, you’ve guessed it was REALLY acid – I hadn’t even taken the pen from the item when the mark disappeared! It couldn’t have been more acid!

The upshot of this is that I bought two smaller versions (couldn't find one large one for a straight swap) of the desktop expanding file (from Woolworths at £2.99 - 13 pockets each) but this time they are made of plastic! My paper is safe!

My trusty pH pen also showed my mum that all the “swatches” of wallpaper she had collected (for something else initially) that she was giving me for scrapbooking, were mostly too acid to use.

The solution to that was to use a photocopy of the original wallpaper!

And some of the paintings my daughter “paints” (ha ha) at nursery, come home on acid paper and others are ok. Significant because I occasionally use them as backgrounds.

So, if you don’t already own one… go get a pH tester pen, it can be revealing!

Wednesday, July 25, 2007

When Inspiration Strikes!

I have had a photo of myself, my husband and my daughter hanging on my pin board for almost a year waiting for inspiration to strike!


Well it finally did!

I have to say that although I had a vague idea of what sort of layout I thought I would do, it was only when I bought a new piece of equipment that it finally came together.

The piece of equipment in question is an X-Cut circle cutter! I have been toying with the thought of spending some dosh on something that would cut decent circles for me, I am capable of weilding a pair of scissors or a scalpel, but it's never quite right, have you noticed that?

Anyway, I finally bit the bullet, grasped the nettle and bought the cutter and a set of 3 ring templates which means I can cut rings or 6 different sized circles!

I knew I wanted to have a theme of circles for this as the picture lent itself to it, and as soon as I bought the equipment it all fell together.

The paper is from a pack from Basic Grey - (favourite company for papers at the moment) - "Blush". Hand made the "3" and the "US" using chipboard letters as templates, but actually cut from a corrugated cardboard box (checked for acidity) and then covered with the paper.
As for it hanging on my pinboard... well that's something I do! Put the picture or a couple of pictures inside a plastic folder and then pin it to my board. Two benefits... firstly I get to enjoy the photos every day and secondly it reminds me I have to scrap it (them) and keeps it fresh in my mind!

Tuesday, July 24, 2007

More Layouts - Not quite using a kit!

Now I am a bit of an ecclectic sort! I like a bit of this and a bit of that... I love variety. Which is probably why I find kits a bit restrictive on their own.


However, use one in conjunction with my own "bits" and things begin to unfold! Or fold up depending on what I'm doing!! LOL.

The layout here (I Love Lammie) was made as an experiment to see if I could make a whole page just using a kit.

The kit in question is the "Srap Pad to Go - Peabody" from K&Co.

Unfortunately I couldn't quite manage just using the kit! So no surprise there then! But I made a good attemp.

I also used this pad to make an exploding box for mother's day. I have taken the photos, but haven't got around to formatting them for on here... suppose I'll have to get on with that now then, eh?! I will try to post them shortly.
I used to think that double sided papers/card were a bit of waste (the Scrap Pad to Go sheets are all double sided), but for things like exploding boxes, they are great because you see the pages from all sides (well technically just both sides!).

Good for concertina booklets and the like too. Which reminds me - I will be posting an article about making a "valentines" or "anniversary" booklet shortly. Even the most die hard non-crafty person can't resist one of those... especially if it's about them!!!!!!!

Sunday, July 22, 2007

All good Intentions

Well here it is...


This is the car layout.

I was planning to write a load here this evening, but as I have been on my feet since 10 this morning till 5 this evening helping out with the local Carnival Parade I just couldn't keep my eyes open when I got home and still can't.

So this is just a quickie to post the layout as promised! There will be more layouts shortly as I have managed a few more recently.

I must muster up a few more tips for you all too!
This layout is inspired using a sketch from Little book of sketches

Friday, July 20, 2007

Scrapbooking Intention - done it!

Well I've managed to scrap a page of pictures of my car!


As I mentioned on Wednesday I was going to scrap a page about my car, it definitely focuses the mind to get it done!

I have used a sketch (as the theme for the crop tomorrow is about using sketches) - it's from the Little Book of Sketches blog. This is a good site for some quick "sketch" inspiration. I will post the photo of my finished layout after the crop tomorrow, although I do have to help out on a gate tomorrow evening at the local Carnival so may not actually get to take a picture and get it uploaded between the crop and that, but there's always Sunday. Are you in a rush?
I bet by now you have said... "Well why am I looking at a picture of a layout about Koi then?" Well the answer to that one is simple... I can't upload the Car one yet, so I thought I give you something esle to look at!
The method in my madness is that for this layout (because the Koi is orange - it's name is Tango!) I needed to use orange in the layout and so I decided to really go out of my comfort zone and use the blue and green, three colours I am not drawn to - my colours are more reds, browns and pinks.
Anyway, the very tenuous link between this layout and the car one I have just completed is the fact that the latest layout is green and blue only. I keep looking at it and wondering??!!
But... you can judge for yourself soon!

Thursday, July 19, 2007

Beginners Scrapbooking workshop

I am holding a demo and workshop at one of the local libraries (Bungay, Suffolk) on Saturday 4th August (2-4pm).

I held a workshop at the end of last year at another local library and we had a number of ladies turn up, of varying ages and abilities. I made a small kit for each of them and they paid £2 for it, only to cover my costs - the demo/workshop was free.

I really enjoy teaching (adults) and seeing how people are "chuffed" (pleased) with their accomplishments at the end of the workshop.

I show them a particular layout design and, I have to say, I expected them to just copy it verbatim, but I was really pleased that each one of them made their own adjustments and at the end of the 2 hour session, all participants went home with their unique version of the demo layout. And they all went away surprised at how easy scrapbooking can actually be when given a little guidance to get them started.

I really want to express that scrapbooking is one of those arts/crafts (whatever you want to call it) that can give someone, who thinks they are not creative at all, a real boost from the knowledge that they can actually create something lovely. And that scrapbooking - the modern way - can REALLY enhance their photographs.

The good thing about scrapbooking is that YOU get to keep your work. I used to make other crafts to sell, which I actually found difficult at times, because of the amount of time and my creativity that had gone into that particular project. With the advent of digital photography at least we can take snaps of our projects before giving things away (like mini albums and cards).

I wish I could teach scrapbooking everyday!

The picture is the 8x8 layout of the first workshop I held when starting up the Scrapbuddies crop. The dog is my dearly departed "Badger" and the words inside the tag (which opens) read...

"Badger...alias Squidge... alias Little Man"
and
"My Darling Badge... How I miss you so."

Wednesday, July 18, 2007

All mine - Scrapbooking Layout intention

"All Mine" is the title for a page I am about to do! There you are, that's different isn't it!

Normally it's done the other way round, ie... here is a layout I have just made! But this time I have decided it's too late to start afresh at this time of day, and I am taking a break from one I have recently started as I have "backed myself into a corner" so a break will mean when I go back to it, inspiration will strike - hopefully.

In the meantime, and I mean tomorrow evening and possibly Friday evening as well, I have to make up a page as a demo for my Crop on Saturday!

The theme is about using Sketches and I have picked out 3 to choose from for my group. As the demo, I have to produce at least one example from the sketches provided.

So I have just decided that I will scrap a page about my car! I have been wanting to for some time and by that I mean since I got it just before last Christmas! Anyway here is a picture of said dream machine (I am really enjoying driving again!).

Some bright spark told me that these cars were "footballers' wives cars" (having a dig!) Well my answer to that was - "ok, give me the income of the footballer's wife and I'm laughing all the way to the bank!!"

I will post the finished layout on Saturday!

Here's to all those of us who are NOT planning on growing old gracefully!!

Tuesday, July 17, 2007

All about Stamps – but not those ones!!

Now when we scrapbookers say “stamps” – we usually think of ones which need inks to make an impression of an image on paper… right? Right… well it’s not those I’m going to talk about today!!

And I suppose the photograph probably gave it away didn’t it?!

Anyway, I really like postage stamps (for scrapbooking you understand, I don’t collect them or anything like that!!). I have found small packets of collections of stamps in a couple of local charity shops.

One packet held about 60-70 postage stamps and cost all of 50p and a more recent purchase was a whole £1, held about 45-50 stamps – these were themed, specifically “flowers”. They are the ones pictured.

Now amazingly enough… my husband’s experience as a stamp collector when he was a boy, came in handy. That’s because the second packet of stamps were still attached to their backing, ie they had been cut out from their envelopes.

My husband knew that to get the stamps off the envelope backing I needed to place them into a bowl of hot water (hand hot, don’t start boiling the kettle!! LOL!) and they would peel off!

Hey… what satisfying fun! I did just that and put them in the hot water, waited for a while (only a few minutes) and then was able to easily peel the stamps from their moorings. Some of them fell away by themselves.

They were then laid on some kitchen roll on a tray to dry.

Of course as they dried they curled a little bit, but then Honey and I laid them out on a sheet of A4 paper, put another piece on top and then, after placing them between two scrapbooking magazines, I tucked them underneath a big pile of Honey’s books!

I did this on Sunday… frankly I have to admit to forgetting about them till about half an hour ago when I was hunting the stack of books for a story!... but now I have lovely flat colourful flowery stamps to use. Trouble is they are so nice I may use them all on a layout just to show them off!!

Does that defeat the object do you think?!

Friday, July 13, 2007

Having a Scrapbooking Laugh!


This little set of funnies is from the families.com site. There is a Friday Funny posted… strangely… once a week!! ha ha!

Anyway, I chuckled !!


An excuse for putting in a "happy picture" of myself and Honey playing in our photo session in the mirror.

*******************************************************************************
Friday Scrapbooking Funnies: Some Giggles and Laughs
by Nicole Humphrey

Enjoy the start of a fabulous weekend with a few laughs I've collected from all over.

Q: If a tree falls onto a scrapbook in the forest, and there's nobody around to hear it, does it make a sound?
A: It all depends. Is the tree made of acid-free bark? Are the leaves made of lignin? What's the pH level of the tree?

Q: Whats the difference between a health freak and a scrapbooker.
A: One lays out her fibre for breakfast the other puts fibre on her breakfast layout.

As seen on Scrapbooking Merchandise:

"Been there, done that, have the Layout!"
Don't just stand there - Scrap Something!
Here a scrap, there a scrap, everywhere there's scraps, scraps.
You better be nice or I will crop you out of my scrapbooks.
When life makes gives you scraps, make scrapbooks.
I scrapbook, therefore I am Creative Obsessed Broke
To Crop or Not To Crop...what a silly question.
Who Says Size Doesn't Matter? 5X7, 6x6, 8x8, 8.5x11, 12x12
Smile nice! Don't make me crop you!
Lord, when my memory goes, please help me find my scrapbook.

and one last thing if you've read this far....

Dianescraps shared this link on her My Site Blog - it was too funny not to share with all of you publicly!!
The Secret Life Of Scrapbooking
Thanks Diane for the laugh!! I cracked up!


************************************************************

The above link take you to view a short video on You Tube… it is an amusing “micky take” on us scrapbookers.

And on the same note… my husband asked me yesterday, if there was anything he could do for me, as I was having to attend to my coughing daughter in her bedroom… “do your blog for you…!!” said in jest of course.

But that gave me an idea… so I said “I tell you what you could for me...”
He groaned, probably thinking I wanted him to do a chore of some sort…”yes,” he said.
“You could write me an article for my blog on what it’s like to be a scrapbooking widower!”
He didn’t seem too keen!

But then in my experience, such a suggestion needs time to be inwardly digested before I see any results!! Lol !!!

Wednesday, July 11, 2007

Scrapbooking with my Daughter

My daughter, Honey, is three and a half… she has the attention span of a gnat (don’t they all at that age?).

I have waited for her to be old enough to start to be interested in scrapbooking. It’s felt like a long wait, but then I’m not known for my patience! Bit of a “quick fix” merchant me!!

Anyway, I was forced to stay at home with her the last couple of days as she had been unwell over the weekend and still with a sore throat, I kept her off nursery and rearranged my work (got to go back tomorrow… sigh!) Of course, we have a couple of week days together every week anyway, but we usually have to do “the shopping” or such like, but because I didn’t want her to “over do it” we had to stay at home.

So I decided to try to get her interested in doing a paper bag album with me. I had actually already compiled the papers, embellishments and photos, etc ready to start.

The subject matter of the pictures was my daughter (photos of themselves always go down well with kids don’t they!!) and the time we visited family who were kind enough to “borrow” a little white pony for Honey to ride for the few days we were there (they have their own horses).

I kept the page layouts simple and because I had already thought about the materials with which to build the album I had everything to hand and so could keep the momentum going and therefore the interest.

There were a number of “stickers” (her favourite) from which she could choose, she had fun using the Dymo (I bought a replacement recently which (if you put the batteries in!!) will say each letter as you press the handle – brilliant for kids!).

She learnt what “rub-ons” are and how to use them – well with a little help, of course – how to use my paper trimmer, she already is quite adept with scissors, so she was “allowed” to use grown up scissors – what kudos!

We started on Monday and did the first 2 pages and then she’d had enough. Then yesterday, she said, “Can we do some more scrapbooking please Mummy?”

Well you can imagine my delight can’t you!!!!!

So we managed to do another 4 pages! Now of course, she wafted in and out of direct “hands on” creation, but stayed with me most of the time. I just need to finish it off, but now she can show it to her auntie (with whom we stayed with the little white pony) and genuinely say that she made some of the book.

It was really nice to engage her in something we both liked to do. I really hope she takes to scrapbooking as she gets older. I think maybe scrapbooking will become something that brings us together… how nice is that?!

Sunday, July 08, 2007

Book Review – "Book of Me" and "Book of Us"

I thought I would do a review of a couple of books I have had for a while:

The Book of Me and the Book of Us by Angie Pedersen.

Now I probably bought these in the wrong order as I bought the “Book of Us” first, that’s because I couldn’t get hold of the BOM (Book of Me) at the time. But because of that I was disappointed with the BOM.

The layouts in the BOM are what I would call primitive in comparison to the Book of Us (BoU) which is packed full of sophisticated (and sometimes complicated) fantastic layouts and albums.

Of course the BOM was one of Angie Pedersen’s first books and was written before the explosion in all things lovely in the Scrap World!

Book of Me

However, BOM is great for beginners… it will not overwhelm the beginner into inaction. The layouts are fairly simple and should actually coax the beginner into attempting a layout or two.

However, for experienced scrappers too, there are lots of great prompts to trigger journaling, ideas for photos, ideas for memorabilia, website addresses for more information.

It also gives you lots of quotes for different chapters such as, childhood, friendship, homemaker, character, personal power, dreamer. There are 15 chapters in all.

A good start for someone wanting to explore self portrait pages and “get the juices flowing”. 80 pages.

The Book of Us

I particularly liked this book as the example layouts/albums are “sumptuous”… there are some fantastic layout ideas in this book. I actually refer to it a lot.

There are 10 chapters including headings such as: Our Perspectives, Circle Journals, Our Love, My gift to You (about making a mini album for someone).

Again there are lots of quotes for you to use, pages of “journaling prompts” which are very helpful to get you started and the photography of the layouts and albums is sharp so that you can clearly read the journaling, some of which is really touching.

In this book there are also supplies lists for the items displayed. 160 pages.

All in all I would definitely recommend The Book Of Us as a scrapbooking resource of inspiration.
For more information visit the link below:-

The Book of Us: A Guide to Scrapbooking About Relationships

Friday, July 06, 2007

Tips for noting those precious moments

Thought I’d bring these tips to you courtesy of the scrapbooking.families.com site. Can you think of any others?
Remembering The Memories
by
Nicole Humphrey

When I am teaching journaling classes, I am often asked, how I go about remembering the memories I've created. It really is not difficult. With any amount of time that goes by, you are sure to forget details and not remember something you might wish you had. There are a few things to help you along.

First, if you hear something funny or that you wish to remember, write it down. On a napkin, or a piece of paper, or whatever you happen to have around. The actual act of writing it down, can sometimes etch it into your brain and its a visual reminder. Not to mention, you won't forget any part of it.
A few other ideas:

Pocket Calendar
I have a calendar I keep in my purse, so that I can write down appointments, events and holidays, and not forget. If my children say or do something funny, or an important thing occurs on any given day, I write it on the calendar. When I sit down to scrapbook, often I will glance through the calendar to obtain ideas. This can work with any type of calendar provided you remember to write it down.

Journal/Diary
If you keep a journal or diary, be sure and keep it handy while you are scrapbooking. If you write down the things you want to remember, it makes it easier to transcribe them onto your layouts.

Pocket Notebook
As a writer, I always have a pocket notebook in my purse or tote bag, wherever I go. I use it to write down inspiration, funny moments and of course, ideas for articles and my books. If you have a small pocket notebook, keep it handy when you are out and write down information as it occurs.

No matter how you choose to remember the event, remember to include things like what you saw, what you smelled and what you heard. These are important aspects to descriptive writing, and can help others who are looking at your layouts and reading your journaling, to remember the same things you did.
***************************
I have a calendar in the kitchen with a month to an A4 sheet which allows space for noting little details, like first walk, first day of nursery and the like along with the boring old dentist appointments! I keep them all in chronological order so that I can refer to them when needed for a date for a particular layout.

Tuesday, July 03, 2007

Why we should scrapbook ourselves – extra

I have been talking about scrapbooking myself, in the hope that it would help some of you start to scrapbook yourselves.

Here is a page layout which I found on the One Little Word blog. This is a blog that uses a word for the inspiration of a page layout. A refreshing idea!

Anyway, this particular layout is from the selection of pages made using the word “My” as inspiration.

I thought I would bring it to you as it beautifully illustrates the intimate, personal nature of some layouts. This is a very moving page. The photograph itself hints of the private and personal and the journaling gives an insight to the innermost feelings of this woman.

I for one know exactly how she feels!! You just want to reach out to her and tell her it’s ok!


This particular page shows elegantly how a simple layout can have a powerful effect. Well done Corinne for creating the page, and thank you for sharing your personal layouts with your fellow scrappers!

Sunday, July 01, 2007

Scrapbooking Ourselves

Following on from the posts regarding “Why we should scrapbook ourselves”, it seems that it is an interesting subject to a lot of people. I have a feeling this blog may go that way, to try to discuss the various issues people may have about Personal Scrapbooking.

I found this post, over on the “A Life Unrehearsed” blog. It’s about a “Personal page layout” and the explanation of this one woman (the designer of the layout pictured) as to why she is scrapbooking herself – as written in the journaling which is also copied below for easy reading.

Anyway… this is (most) of the content from that post by Bonnie Kempenich on the “A Life Unrehearsed” blog...

***********************
Scrapbooking Ourselves.
This is why we do it, right here.

Her journaling reads:
Scrapbooking myself, taking photos of myself and telling my life story seemed strange to me at first, kind of vain in a way. But when I saw my children and husband's reactions to the pages about me, their genuine interest and my girls telling me how cool it will be to have stuff about their mom when they are older, I threw my inhibitions out the window. Realized telling my story through my scrapping is therapeutic for me. And it's important. I find a lot of inspiration in my life, in my experiences and I now love being able to express who I am, where I've been and where I want to go on the pages I make. And my kids will have these bits and pieces of my life to look back upon.

She said it all.
We're not being vain. We're being real.

Leaving a bit of us behind for our children, after we're long gone.
So important -
That our children not only remember the fun, happy times, the special events - but that, they also get to know the real woman. The real woman they call MOM.
*****************
The inspirational page layout is by Kate O’Brien and she has given me permission to publish it here for you. Not only is she scrapping loads… but she has 7 children!!! Incredible Kate - I take my hat off to you!