Friday, June 29, 2007

Quick and Easy Conversion to Black and White


Sometimes, we have just the right papers for a particular “type” of photo, but the photograph’s colours just clash with the kit we’ve put together… the answer…

Change the photographs to black and white.


The layout pictured here includes a photograph of my daughter wearing a bright red top and jeans! However, printing the photograph in black and white allowed me to use this fabulous blue paper from K & Company (from 8.5 x 8.5 Garden Collage Pad). This page was made up during a demo about using patterned paper. This shows the simplicity (pardon the pun with regard to the LO title!) of making a page using heavily patterned paper. All I have done here is cut out some of the images from the paper which would end up behind the photo anyway, and adhered them to the front.

I have also carefully cut around some of the images and just slipped the photo underneath. In theory I would not need to glue it in place as these "cut outs" are holding the photo in place. The only things I have added to this patterned background is ribbon and the rub-on words.

Below is a little article by Christine Smith I found on pagesoftheheart.net ...

There are plenty of ways to convert a photograph to black and white for use on a scrapbook page! Even without photo editing software, you can do it in one of these three ways:


1. If you are without a digital camera or photo editing software, use your scanner. Place the photo you wish to convert on your scanner and set your image type to grayscale. Scan as usual, and you will have a black and white image with which to work. If you print this image with your color printer, be sure to set your printer ink setting to black and white so that your printer will not use color ink to make the grey, causing an off-cast color.

2. If you already have an image file on your computer, such as from your digital camera or a scan and it is color, try setting your printer to black ink and printing it -- instant black and white! Be sure to use photo paper for the best results.

3. If you have a digital camera and want to easily convert to black and white, use the digital kiosk at your favorite chain store or photo store to do the conversion.


Tuesday, June 26, 2007

Why we should Scrapbook ourselves! – Part 3

Personal Page Layouts

Well in Part 1, I talked about taking some half way decent photos of yourself in private. In Part 2 I spoke of various ways to print those pictures. So here in Part 3, it’s time for me to talk about the Personal Page Layouts themselves.

I know you are probably thinking…”all right then, where exactly do I start?” . Well as with all things in scrapbooking there is no particular starting point, but I will share mine with you.

I had seen a number of BOM pages… “Book Of Me” pages in various books and magazines. Some of them were simple lists of likes (or dislikes!) “10 things about me” sort of pages. I quite liked the idea of these and thought they would be fairly simple to achieve. But you know, it’s actually quite difficult at first, spending time thinking about your “real” likes and dislikes.

Now then, by “real” I mean those preferences which are actually yours and not the preferences you have “acquired” from your partner, or children. Life, when you decide to share it with someone, is a life full of compromise, is it not? It’s supposed to be give and take, but if you’re not careful your personality becomes a compromise too. It’s all too easy to slip into the “well I don’t eat that anymore because no-one else in the house likes it”, “oh well he (or she) likes to sort all that out”, “I don’t do (whatever) because my partner doesn’t like it”!

Because of this merge of personalities, and our natural selflessness when we become parents, we lose sight of our “real” selves. Frankly, if you are a little bit like me, you may have even “tried” to lose yourself, but we can “run, but we can’t hide” eh?! And it is precisely this loss that makes it difficult for us to scrapbook ourselves.

I actually started my first Layout with the lyrics of a particular favourite song in mind… “It’s My Life” by Bon Jovi.

I chose the colours I like most, I used a real maple leaf which I had pressed years ago because I really liked its shape and colour and, when I made the page, I was really into tags and buttons (well I still am really!) There is a pocket for some hidden journaling, but although I have made the insert for this, I have not actually written the journaling.

“Why?” I hear you ask.

Well the answer is that this is a really personal page for me and I would like to write lots of personal things there, and maybe some day I will, just not right now, although I have taken a few notes! So even if you don’t know exactly what you want to say yet… just leave room for your journaling, whether it’s hidden or not.

As part of a demo for Scrapbuddies – my monthly crop, I created a page called “5 Things about Me”. I tried to get my scrapbooking group to do some self portrait pages but they all looked terribly uncomfortable at the thought of having to put a photograph of themselves on a scrapbook page! This is why I also did a demo of a page with no photo… just a whole load of ribbons – because I love ribbons!

So you see you can easily create pages about yourself without your “mug-shot”! Don’t be afraid to write about yourself… it’s what others want to read!

Part 4 will be about something EVEN more personal… a mini album for your husband/partner for an anniversary or valentines… my husband loves his!!

Sunday, June 24, 2007

Why we should Scrapbook Ourselves - additional

I have posted parts one and two of “Why we should Scrapbook Ourselves” so far and I am working on Part 3 as we speak! However, on this subject, I share with you part of a recent post from the “Cooking with Paper Pesto” blog.

*************************

How about an album about you?

This is often one of the most difficult subjects for women to scrap about, but what a wonderful legacy to leave your children and future generations – a glimpse into what makes you the person you are.

If you can’t quite manage the deep and meaningful stuff e.g.

· What are the important values in your life?
· What are the lessons your parents taught you that you’ve never forgotten?
· What are your dreams for the future?
· Who are the most influential people in your life?
· What were the best moments of your life to date?
· Who are you – content, happy, sad, a worrier, carefree, restless, angry, creative….?
· What do you really, really like about yourself?
· How has your personality changed in the past 10 years?

Then what about some completely “frivolous” topics, that may actually say more about you than you think e.g.

· The contents of your purse,
· What did you buy this week?
· If you could be on a reality TV show, which one would you choose and why?
· What’s your housework strategy?
· What are the favourite things in your home and why?
· What do you do for fun?
· If you were stranded on a desert island who and what would you want with you?

*************************

So there are some more ideas, deep and meaningful or just fun, whichever you choose, your offspring will appreciate the insight into your nature. And you maybe will find a little bit of you again too!!

Friday, June 22, 2007

An alternative View


I am writing this post whist sitting in my hotel room at the Newport Bay Club, one of the Disney hotels in Disneyland Paris.

“Ooh er,” I hear you say! Or… “sad woman can’t leave her laptop at home and have a holiday!”. Well the reason for posting this blog now, is that I managed to get an internet connection, or should I say buy and internet connection, and I was darn well going to use it all! It was a bit of an experiment for me really to see if I could use my WiFi out and about!

Anyway… I used the title “An Alternative View” for this short blog post because I have made the decision that I am going to scrapbook the “real” Disneyland Experience!

After a bit of a disastrous holiday last year where we spent the whole time catering for my daughter (then 2½ years old) and didn’t get a holiday ourselves, we decided not to try to please everyone but to bring my daughter here on holiday so that there was lots for her to do and we would do this holiday for her basically. Then next week we are dumping her on my mum and going to a hotel over night (my husband and I) for some adult time, in a child free environment!

So we knew there would be lots of people and children, but there is still more than we expected to find in school term time in June!

But I have decided to do some scrapbooking layouts not on the usual “Wonderful World –of…” but rather the “Scruffy, Disappointing and down right rip-off” side of things here!

I will of course post the photos of the pages here, so watch this space. But I think doing scrapbook pages with a negative view in mind, might be a refreshing challenge! We mostly scrap good events… so it will be a change from the norm… Sorry Norm, nothing personal! LOL!

Sunday, June 17, 2007

From Lyrics To Layouts

I came across this article which I wanted to share with you all, as I thought the lyrics to the song which Joyce has reproduced here were very touching. It’s an old post (2005) I found in some archives, and it’s about using lyrics as inspiration for a scrapbooking layout or even a whole mini album.

To all of us who have children, it is fairly poignant. Mine is only 3 at the moment, but growing up fast and I try very much to cherish the little moments of realization, you know the ones… those moments when you just see things for what they are and not what you are constantly trying to make them! Those moments when time stops fleetingly and you’re just “in the moment” before your surroundings take over again. When you say quietly, “haven’t they grown!”.

The picture above is of my husband and daughter walking across to feed the ducks. Anyway here it is.

*************************

From Lyrics To Layouts
By Joyce Groom - Jan 30, 2005

I can't count the times I have been in my car, driving down the road with my radio turned to my favorite station. It's playing an old favorite song of mine or a new release when scrapping comes to mind.

The song will inspire me into thinking about my next layout. The words to the song reminds me of photos I have or someone special in my life. As the song plays on, I start thinking about the paper and embellishments I will use for the layout and how I will journal on the layout.

I mentally remind myself the title of this song as the tune comes to an end. But time after time, I forget about the song and the dreamed up layout as the next song starts.

Music lyrics can be very inspiring. A song can trigger memories, feeling and emotions. Scrapping is all about memories, so why not do some layouts and use the lyrics from songs as your title or journaling?

Since I always forget the song I am going to put a note pad in my car and the next time this happens, I will pull over and take notes so I don't forget.

couple days later...
Well, I did it!! I heard a song that inspired me and pulled over to write down the title and singer of the song. The song is titled "Let them be little" and it's by Billy Dean (Lonestar). I just used parts of the song for my project but all the lyrics are printed below.

Song: Let Them Be Little
By Billy Dean
I can remember when you fit in the palm of my hand.
You felt so good in it; no bigger than a minute.
How it amazes me you're changin' with every blink.
Faster than a flower blooms, they grow up all too soon.

So let them be little,'Cause they're only that way for a while.
Give 'em hope, give them praise,Give them love every day.
Let 'em cry, let 'em giggle,Let 'em sleep in the middle,
Oh, but let them be little.

I never felt so much in one little tender touch.
I live for those kisses, your prayers an' your wishes.
An' now you're teachin' me how only a child can see.
Tonight, while we're on our knees, all I ask is:

Please, let them be little,'Cause they're only that way for a while.
Give them hope, give them praise,Give them love every day.
Let 'em cry, let 'em giggle,Let 'em sleep in the middle,
Oh, but let them be little.

The so innocent, precious soul:
You turn around, an' it's time to let them go.

So let them be little,'Cause they're only that way for a while.
Give them hope, give 'em praise,Give them love every day.
Let 'em cry, let 'em giggle,Let them sleep in the middle,
Oh, but let them be little.

Let them be little.

Now to share my project with you. I decided to make a whole mini accordian album using lyrics from the song and photos of my daughter from her birth til the day she graduated high school. The end result is something that's very special and touching to me because they DO grow up too soon!!
****************
If you would like to see the photographs of Joyce’s project click here

Saturday, June 16, 2007

Let your Words paint the Picture

There are many times in our lives when something is said, done or experienced but we have no photographs to record it.

So there are a lot of things that we would like to document in our scrapbooks, but don’t due to the lack of pictures.

Well there is no reason why we need to have a photograph on every page, is there?! If you don’t have photos, there are lots of was you can bring the memory to life.

Possibly most important must be journaling. You can use the journaling as the focus for your layout. Of course there are the usual things you may have picked up from a specific event (such as an outing) like tickets, receipts, programmes, etc and these are great for embellishing your story. (So rather more like your old-fashioned scrapbooking then!).

Conversations...

If, however, you are conveying maybe a cute conversation between yourself and your 3 year old daughter, for instance, then you won’t have memorabilia available! In this instance there are thousands of ready made embellishments with sentiments that could compliment the message to your viewers. And some of these embellishments are works of art in themselves and can complete your scrapbooking layout very well.

Another way of creating interest on a page with no picture is to embellish the written words themselves with highlighting and changing typefaces for different words to give EMPHASIS on certain points. Changing the font size is another way of adding interest, as is using labels or other “3D” effects on certain words.

For those of you will a “real” camera phobia who just will not have their picture taken, this is a great way to create self-portrait pages. Use journaling about yourself, your likes and dislikes, events, feelings… the works. It will end up being a kind of embellished personal diary, but your loved ones will enjoy it… especially if you hand write a lot of the journaling.

But bear in mind that everyone wants to see you - the good and the ugly, the ups and the downs, the young and the old!

But if you don’t have a picture of yourself… or the event or memory you want to pass on… no worries mate… as they say down under (so they tell me!) just journal!

Friday, June 15, 2007

Tips for Publishing your Scrapbooking Layouts

Thought the information on this recent post over at layoutblueprints was worthy of inclusion here, it is actually written for those of us who are trying to get our pages published in a magazine or similar.

******************

Can you take it?

We really want to know. Occasionally we see a layout that we like, with the exception of one element that needs to be changed to make it flow better. Do you want to know? Would you rather be published having made the change? Or would you rather not change a layout you've already created?Often times it's something simple, like changing one mat color, mounting a photo, adding journaling, or outlining a title.

We've begun asking for the small changes when it's a layout that doesn't need much, and it's easily communicated to the artist.

A few things we can mention that seem pretty common, that can really throw off a layout are:-

Titles. This one is huge. It's a really important part of a layout, and if the title doesn't jive with the rest of the layout, it can throw the whole thing off. And often times, it's hard to communicate that to someone to have the layout changed. Title should be creative, not overwhelm the layout, and make sense with the theme and photos.

Journaling. Again, an integral part of the story. A photo can occasionally stand on its own, but more often than not some journaling is required. Just remember that your audience (the editor reviewing your LO, and potentially the readers of the publication) don't know anything about the photo, the subject, or why it was taken. Interesting journaling will often be favoured when deciding between two layouts of equal caliber.

Photos. Choosing photos can be difficult in this age of digital, because we are able to take so many. But more is not always better. Choose photos that are in focus, clear, well-lit, and clearly show your subject or tell your story to be your focal photos. The other photos in the layout should add to, not detract from, the focal photo(s).These are the main issues than can keep a great layout out of the final cut.

Wednesday, June 13, 2007

How to get all those photos on your scrapbook layout

In this age of digital cameras we have the facility to take multiple photographs of a subject… and frequently do! We no longer have to worry about the cost of processing a film and I for one, take lots of photos, meaning to delete most of them, just keeping the few best ones!

Doesn’t happen like that though does it?! I take loads of photos… I look through them and make the obvious deletions like blurred shots. But then I realise I have taken the equivalent of what we used to call a “whole reel” of film and actually I want to keep them all!

You know… the ones where somebody is pulling a funny face, or a natural pose that is slightly out of shot. You end up with lots of similar photos, but just slightly different enough to want to keep them all.

Well, you can’t print every one and scrap them all! Even if you were willing to create that many pages - they would make a rather boring scrapbook album wouldn’t they?

Well the very reason for your huge number of photographs (ie they were created digitally), can actually be a benefit … you have the capacity to print out these numerous photos in whatever size you like!

Now I am assuming you have, or have access to, a printer of some sort. You can very easily print a larger picture of the one you like most from a set of photographs and then print a series of smaller ones.

This is what I did for the scrapbooking layout “You & Me” above. And it is the easiest way to achieve multiple pictures on a page, ie a straight strip of 3-4 pictures.

To get some idea of the size of the pictures I need for my layout (the one above is 8x8) I open up ‘Word’ and using a line drawn to show the 8x8 approximate length of the page (instead of the whole A4 – you’ll see why in a mo!), I place the pictures onto the page to see how big they are, and reduce/crop them till I am happy.

Then, I can delete my line and tighten up my pics to the top of the A4 sheet, I then place any other pictures of which I would also like a copy and hey presto, I have used an A4 sheet of photo paper without wasting any (or very little anyway).

I did post about using a word processor program to print photos a short while ago in the post about scrapbooking ourselves - click here.

Tuesday, June 12, 2007

Who are they, what shall I write?

Ideas for scrapping old photos with no specific information

Most of us have old photographs or, as per my post last Sunday, we have a
Scan or photocopy of some oldies.

You will probably have been told who it is in the picture and that’s it. If you’re lucky you may have some idea of the year (or decade!) in which the photograph was taken.

How do you scrapbook this type of photograph?

Well one way is to journal in the present. By that I mean that your journaling, and maybe even your title, could be in the form of questions to the person in the picture. For instance… “What was your life really like Grandad?” as a title for page, with some questioning journaling, such as “I wonder what your life was like as a young man?” “I wonder what made you be a fireman?”, etc.

Talk (write) to the person (in the photo) as if they could hear you, in other words in the ‘first person’. “I wish I could have got to know you better, but I was only a little girl when you passed away….”. Tell the person how you feel about them.

This is also a good way to create pages for loved ones, whether they are still with us or have already “shifted off this mortal coil” (come on Monty Python fans… keep up LOL!) It’s a bit like writing a letter to them. If it’s really personal stuff, then hide your journaling under the photograph or in a pouch.

Sometimes, when just writing a few words to the person in the photograph, you will be able to pick out a great title for your page from within the journaling. Why not give it a go.

Picture is of my Grandmother circa mid 1960s. Gonna be “talking” to her for sure! Will post the resulting layout soon!

Monday, June 11, 2007

Scrapbooking the Good and the Bad!

Most of our scrapbooking is devoted to good times, good friends, family, etc. I have seen very few pages which record something not so good. When I have come across such a layout I have found them fairly moving… emotionally.

I haven’t actually created such a page myself yet, but when my daughter recently had an altercation with the top of one of her fingers and a door (!) I did actually remember to take the camera with me the following day (after the A&E) when we had to go back to the hospital to have the top of her finger sewn back into place! Great way to spend a Sunday and bank holiday Monday!! Mind you it was chucking it down with rain outside, so we were ok inside, and being a bank holiday, there were only a few people in the ward.

Anyway, I took the camera to the hospital to make my daughter feel that it was a good thing to be there and for her to enjoy looking at the photos later.


I plan to make a little mini book of it for her to have with her… may photocopy the original so that she can have one to carry with her to show people (after all she is only 3!)

As for other “bad” or “really” personal stuff… I have yet to come to feel the time is right for me to scrapbook some picture of my Dad, who dies suddenly 2 years ago. Strange but I feel guilty that I should have by now… but I just can’t face it yet!


Top picture: Honey in her hospital gown.

Middle: on the way to plastic surgery.

Bottom: First meal of the day... 1pm (ish) - poor little thing was famished!

Sunday, June 10, 2007

Don’t Panic… the answer to scrapbooking your OLD photos!

Ok… own up… who hasn’t scrapbooked their photos yet cos they are frightened about cutting them up, or confused about all this talk of acid causing havoc or both?

Well in this day and age of computers, photocopiers and scanners… you don’t have to make either of those decisions!

Now obviously, I am talking about all those original photos from pre-digital era, which let’s face it, is still relatively new, so we are talking precious “one-off” photos.

Don’t be fooled into thinking that scrapbooking is just a way of storing your photos… it is so much more than that, but the main reason for scrapping our photos is so that we have a lovely way to show them off. There is not much point in having our photos frankly, if we are not going to enjoy them, right?!

I can’t be the only one who has found themselves sidetracked whilst looking for a specific thing spending the whole evening reminiscing whilst wading my way through my stacks of pictures!

So, the answer to not scrapping old photos because you don’t want to harm them is simple… don’t scrap them!

No, it’s alright, I haven’t gone mad, what I mean is – make a copy!

1. You can scan them in, if you have a scanner, and then print them out.

2. You can photocopy them, with an all-in-one printer if you have one, or take them to the local shop which has a colour photocopier to get them copied.

3. You can also photograph them!! Using your camera in daylight or with a daylight bulb (mind the reflection though) you can take a photo of the picture and download it straight onto your computer – not the best method, but if needs must as they say.

You can then store the original photograph in a pocket at the back of your layout. (More on this trick of “invisible storage” as I call it, in another post).

The picture at the top is of me aged about 4 (around 1972), a picture “borrowed” from my mum’s collection – scanned in.

Saturday, June 09, 2007

Are you living a life to remember?

I found an interesting snippet (which was actually a post back in April on a blog whose author's details I have unfortunately lost!) which I wanted to share with you. It refers back to my posts regarding self portrait pages (yesterday and end of May). I think you’ll find it interesting too.

******************************

In visiting scrapbook celebrity Heidi Swapp's website, I found a link to a handout she used at a women's expo she did recently. It challenged its viewers with five different challenges on the topic of "Are you living a life to remember?" I thought they were excellent, and that they made an excellent scrapbooking challenge.
The five thoughts are--

Remember to be passionate about something
Remember what makes you happy
Remember what matters most
Remember to cherish those you love
Remember to have fun
Remember to be grateful

My challenge to all of you is to think about those five thoughts. Journal your responses to each of those thoughts, then if you are so inclined create a scrapbook layout or art project based on one of them or all of them. What a wonderful way to put the important things in perspective.
And if any of you are interested in seeing the original handout form, go to http://heidiswapp.typepad.com/my_weblog/files/expo_handout.pdf ...

*******************

Now the link above does indeed go to the pdf file of the handout, but I can’t find anything on the Heidi Swapp site that refers to the women’s expo which the writer speaks of. You may have better luck! We must all remember to savor those important moments in life and scrapbooking can help us do that so well. I think I will make a scrapbooking layout using one of these thoughts as inspiration.

Friday, June 08, 2007

Why we should Scrapbook ourselves! – Part 2


Scrapbooking Layouts – A Very Personal Journey

Carrying on from Part 1 about actually trying to take a decent picture of ourselves, I thought I’d mention the printing of such photos!

Having finally got around to taking some photos of myself in the mirror, I then started to feel a little self-conscious about having them printed by someone else! Well you know… I felt they would think me vain! In truth, why should they be bothered. But, and this is more important, I shouldn’t let myself be bothered about what others may, or may not think of me… something with which scrapbooking is helping me (more about that in another post).

Anyway, initially I thought I could print these self portrait photos out myself of course, but my printer at the time wasn’t really up to the job! So I ended up taking a disc of the photos down to my local shop where there was a Kodak Instant Processing Booth. It was here that I printed my first self portrait pictures and those are the ones you can see on the layouts in my first post on this subject.

I found I could print them out at the booth in relative privacy, and the quality was good, certainly a lot better than my printer at the time.

After creating my first self portrait page “It’s My Life” I gained a little more courage to actually get some more photographs printed by a photolab and was pleased with the results.

You may well be feeling a similar sense of self-consciousness about taking pictures of yourself… but I assure you, it is possible to shoot and print them in relative privacy, even if you don’t print them at home.

By the way… a little tip for those of you struggling a bit with how to print your photos.

I was having a conversation about this with my mum. She was struggling to use the program which came with her camera to view and print her photos. She had managed to print a couple, but they were large and printed right in the middle of an A4 sheet of photo paper (which isn’t particularly cheap) and of course it wasted all the white space around the edges.
Now… there are packages out there for fiddling with and printing photographs, but for a large percentage of home users… all they want to do it print the picture (or pictures) onto a piece of paper.

So here is my tip for successfully printing one or more photos onto a sheet of A4 paper, to get the most value for money out of your sheet.

Use your word processor.

I use “Microsoft Word” and my Mum uses “Lotus”. But most word processing packages are very similar. This is what I do.

In Word, I bring up a blank sheet of paper and reduce the margins just enough so that they are within the printer’s range. I take them down to about 4mm top, left and right and about 7mm at the bottom.

I then insert the first photograph I want into the “piece of paper” on the screen. It always brings the picture in full width (so it may initially take up the whole page) but all I do is click on a corner of the picture and drag it towards the middle to reduce it’s size. Now I can use the crop tool to trim it how I want it, and I can also adjust the contrast and brightness too. I also have the facility to change the image to black and white.

I use this method of printing for most of my photos. It is especially good for printing a load of photos for a mini album or something like an exploding box. I can manage about 12-15 pictures of approximately 5cm square (2”) on one A4 sheet and there is very little wasted paper!

If you want to have an exact measurement for your photos, ie all the photos cannot exceed 5cm width because the exploding box pages are only 5½ to 6cm wide anyway, you can go into “properties” for each photo and specify the height or width and, hey presto, the other measurement is automatically calculated for you.

Just click to the side of the picture to insert another picture beside it and so on.

So … now you can photograph yourself and… you can print lots of them using your printer… but the great part about printing them at home is that (also in Word) you can “flip” the images so that the photographs are no longer mirror images. Particularly important if you cut out the camera from the shot!

If you print using a photolab… unless you have fiddled with each photo to flip them before saving them onto a disc, you will end up with mirror images (of course!). All ok, but that’s not how others see you.

"Interesting to see what others see..."
It’s actually quite interesting to see the flipped image of yourself… it’s not how you are used to seeing yourself in the mirror, but it is how other’s see you, and strangely it takes a little time to get used to it. No-one has a symmetrical face and I for one, have a side parting!!

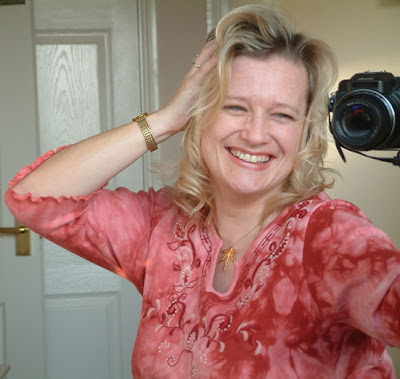
My profile picture on this blog, was achieved by doing the above. The slight difference is that I opened it in a photo imaging program to crop, reduce and flip it.

So… have I given you any more incentive to try self-portrait photos?

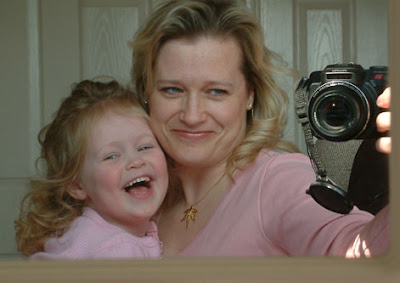
I have also achieved some nice shots of my daughter and I together using the “mirror technique!

Part 3 will be about how you can scrapbook yourself… now that you’ve taken some photos! LOL!

Thursday, June 07, 2007

Keeping a sense of humor!

I thought the following little ditty was funny… and a bit of humor is always a good thing, especially in a world gone mad with trying to protect us against ourselves so much that we not allowed to do so much without jumping through hoops and/or red tape. Anyway… thought I’d share it with you all.

Home Remedies That Really Work

  • If you are choking on an ice cube, don't panic. Simply pour a cup of boiling water down your throat and presto! The blockage will be almost instantly removed.
  • Clumsy? Avoid cutting yourself while slicing vegetables by getting someone else to hold them while you chop away.
  • High blood pressure sufferers: simply cut yourself and bleed for awhile, thus reducing the pressure in your veins.
  • A mouse trap, placed on top of your alarm clock, will prevent you from rolling over and going back to sleep when you hit the snooze button.
  • If you have a bad cough, take a large dose of laxatives, then you will be afraid to cough.
  • Have a bad tooth ache? Hit your thumb with a hammer and then you will forget about the tooth ache.
  • Finally...be really good to your family and friends. You never know when you are going to need them to hold the vegetables.

I found it on Julie Invercargill’s site, good isn’t it! A little bit of light relief… hey ho back to scrapping!

Wednesday, June 06, 2007

A bit of Planning before the Event!

I was traveling around the “ether” again last night and I came across this post.

Although the information is targeted at people making a gift album, it is actually relevant for all our scrapbooking layouts really. Goes back to “a little bit of planning goes a long way”! How many times have you said to yourself – “oh I wish I had taken a picture of …”. What’s more, it’s worth photographing what you might call “the ordinary things”. Because oddly it’s those things that will bring back the memories in years to come.

“… Planning a Gift Album Before the Event
by Nicole Humphrey

Gift albums are such a special item to give. They are also the easiest scrapbooks to make. Some people disagree, but they take less time to plan and complete than an entire album, and the memories and feelings that they can evoke in the recipient, are priceless and timeless.

There are no set of rules when planning, selecting or creating your gift album, however one thing is true, planning ahead can make a world of difference.

Perhaps you are planning on making a school year gift album for your child, or your child's teacher, or maybe you are planning a vacation gift album for a dear friend or relative that will accompany you. The ideas for gift albums are endless and will be discussed in another article, but for now, we are focusing on planning ahead.

Typically, the theme is the easiest part of creating the album. You might want to commemorate a friendship, or highlight certain special places you've been together. When setting out for these events, with camera in hand, having some idea of the types of photographs you wish to capture, can really help.

Let's pretend you are going on a special vacation with your friend. Before you leave, you might have an idea of some of the sites you plan to visit, or perhaps some of the activities you plan to participate in. Grab a piece of paper, a pencil and a quiet place and think about your destination. Will you be eating out for most of your meals? Will you be staying in a hotel room together? Perhaps you both enjoy red wine, and will have a glass before retiring for the evening.

All of these events are perfect for pictures. When you plan your vacation, try to plan a few pictures around what you will be doing. If you eat at restaurants, exclusive to the area, don't hesitate to ask the server to snap a photo of the two of you, enjoying your meal. In your mind, you might wish to remember special conversations, funny moments or just how you are feeling at that moment in time. When you return to your hotel room, jot those memories down while they are fresh. This will help when journaling in your gift album.

When you finally sit down to scrapbook, you will have a nice variety of photographs, many planned, and some great journaling to add to your pages. And if you planned ahead, you won't forget any of the pictures either, so everything you wanted, will be right there and ready. Oh, and don't forget to enjoy your vacation. …”

So… there you are – some great ideas. Although it all may sound a bit complicated, if you think about it at home and write notes beforehand, you should enjoy your holiday more because you don’t need to worry about not getting the right pictures!

Tuesday, June 05, 2007

Key questions for your personal journey

I found this on my “net travels” – actually via the Scrapbook Inspirations site. It is a copy of a section from Joanna Campbell Slan’s ezine. I thought it particularly interesting for us scrapbookers as a “checklist” for organising our minds for self-portrait layouts, or even mini albums for that matter.

I believe more and more that scrapbooking can be a fantastic way of helping us “look at ourselves” and find the real person inside… not just the mum (or dad for that matter) wife, partner, auntie, etc that we seem to become!

Anyway… this is what she says…

“…All of us choose to learn new things. We start out small, feeling inadequate, and work to greater heights. Journaling about your journey can help you see how far you've come.
Key questions:
Why did you start this journey?
What obstacles have you faced?
Who has encouraged you?
When did you begin to feel you were making progress?
What changes have you seen? What can you do now that you couldn't do before?... “

This was actually in the context of one person slimming and the author herself weight training to increase her bone density… but this list of questions can be used for almost any personal journey in life that we want to achieve.

I wonder if starting an album or set of pages at the beginning of something new… like trying to lose weight, might actually help keep us on the straight and narrow… to achieve our goals?

You know… I might even do just that! I want to lose some weight (that I can’t seem to shake off post-pregnancy) and I should definitely get fitter! Maybe… if I do the pages and even post them on this here blog… I would have YOU to answer to if I didn’t keep it up!!

What do you think about that?!!
For help with journaling… check out Joanna Campbell Slan’s site here.

Monday, June 04, 2007

6 More tips for Free and Discount Scrapbooking supplies

Here are six more tips for your scrapbooking layouts... simple but effective!!


1. Keep your scraps to make up cards and to experiment with paper collage techniques. These collages can be used as backgrounds for your scrapbooking layouts. Also scraps are perfect for small albums, like 4x4” albums, etc.

2. Freebies from magazines - embellishments and papers. I currently subscribe to
Scrapbook Inspirations which has free papers and a gift every month such as chipboard tags, stick-ons, blank mini album. The great thing about it is that the papers are quite often colours or designs out of my “comfort zone” and I find them really useful for broadening my design horizons.

3. Network with other scrapbookers, swap supplies. At
Scrapbuddies (our local monthly crop) we often swap items of which we have loads and want to give out to like minded people who will find a use for them.

4. Take photos of signs and then cut out for fun letters for use on scrapbooking layouts. (Don’t forget that you don’t have to print them onto glossy photo paper either.)

5. Make your own stamps using foam. The type to which I refer is the really dense stuff (
Plaid decorator blocks). They come already cut into shapes, but you can also buy a blank sheet. These are great for making up backgrounds or for just repeated images. Just use a sharp craft knife, it’s a cheap way to gain custom designed stamps.

6. Use children’s paintings as backgrounds for scrapbooking layouts. I have used my daughter’s “splashings” of paint as backgrounds for some pages (see picture above). Some of the colour combinations are great and at the moment she is completely covering a whole page with paint (the only bit left blank is where the bulldog clip was holding the paper to the stand!!!). I do double check the acidity of the paper… and so far so good! Also their scribblings using coloured pencils and crayons work well.