Wednesday, September 26, 2007

Scrapbook Journaling Ideas

I'm packing (again) for another week away, and have a streaming cold too right now so haven't been able to type up my notes! So here is a little exerpt from the "everything about Scrapbooking site, about some journaling ideas. I think they are quite interesting!

The Layout here is a "Favourite Layout" as published on the above site's pages.

Journaling about Significant "Invisible" Issues
It's unlikely that you'll have a photo for every significant moment or event that happened in your life. OK, maybe you might now arm yourself with a digital camera wherever you are for those "just-in-case" moments.


Still, some of the most impromptu and important moments struck before you can hit the camera's button.

Go ahead and create a scrapbook layout revealing your joy, your triumphs, your failures and the good and bad bits of such moments, without the photos. Don't get stuck marrying photos to every layout.

You can always use a photo from another event for such a layout. Alternatively, simply skip the photo part and let your journaling take the center stage.

Let your memories play full out in words.

Journaling about Little Care Instructions
Create a scrapbook sharing little care instructions for your little boy and little girl. I got this idea from Creating Keepsakes' founder, Lisa Bearnson.

Such a scrapbook containing care instructions can prove to be a life savior in times of emergencies. When mommy isn't around for awhile, daddy or the temporary caretaker can have an "instruction manual" to refer to.

Flipping through the little care instruction scrapbook, the temporary caretaker can quickly know what is your girl's favorite doll that soothes her, what TV program is a must-watch every afternoon at 2pm for your boy, and what's their nap time.

Monday, September 24, 2007

Thank you for…

Just getting back to “The Secret” (see Sept 7th Post) for a moment – A pal I have met through UK Scrappers left me a message on that post to say that there is actually a blog specifically re “Scrapbooking the Secret”.

Unfortunately it only appears to have been live for a short while but gives you an idea about it all.

That site goes into scrapping pages about yourself, but I was thinking about how our love of scrapping could help us “attract” more “good” into our lives.

How…?

Well, you probably know all about “affirmations” – the famous one being…

“Every day in Every way, I’m getting better and better”!

Wee we all need to think in a different way – a more positive way – about ourselves, our loved ones and our lives generally.

To this end, and because we are all in the ‘bad habit’ of not being thankful for what we already have, we need to constantly remind ourselves to say thank you.

So I was thinking… why not make up some reminders, some people stick Post Its on their mirrors , put notes on the fridge door, etc…

Why not scrap some and hang them around the place – think how much more aesthetically pleasing they would be.

So… my mission this week… to make at least one reminder – which I shall put by my bed, so I see it when I awake, so it’s the first thing I do, and it will say something like…

“Thank You for all the Good in My Life”.

I will upload a photo of the finished item as soon as I have made it.

In the meantime… here is a layout I did of myself and my trusty camera – something I am truly grateful for. And… what’s more I was given a large amount of the money for it from a friend and some more from my mum and the rest I gathered together, in time for the birth of my daughter. And, of course, ever since scrapbooking came into my life, I use it almost on a daily basis. And my camera is so much more than just something that takes snaps!

Sunday, September 23, 2007

Home Again

Ah, finally home now after a week in Majorca... little pic taken this morning before we left for the airport.


I had to ask for the picture to be taken cos there were actually no pictures of myself with my daughter (or anyone else for that matter!) to show that we actually went on holiday together!!

Anyway, I did say this would be the main post, but frankly I am feeling somewhat tired and am off to my bed, so looks like the post will have to wait till tomorrow!

I have written it (on good old fashioned paper!) whilst I was on my holidays! (sad!) so will be here very soon.

Quick update - Main post later

Back with my trust LT now (laptop), and the reason for not being able to post much this week... I was in Majorca!

For security reasons I don't like to "let on" to that fact until I get back to the house and all is well!

However, usually I go away with just my daughter for a few days at a time and can't necessarily post whilst I am away, but my hubby is at home with the animals, so the house is secure from that point of view!

So this is just to say I will be posting some pickies later today!!

BUT did anyone see my item in October's Scrapbook Inspirations magazine just published?

Thursday, September 20, 2007

A quickie Post

Now for those of you that know me personally... you will know why this is just a "quickie" post.

I just wanted to stay in touch even though I currently have no access to my trusty PC!

Which is why there were no pictures with the last post. I do like to include at least one image with each post, but sometimes, it is just not possible to do so. However, I will have access again shortly and then will be able to upload some pictures! Hoorah!!

However, until then here is just a mini TIP for you...

If you are a beginner and planning to buy some stamps (the ones you stamp images with!) I would advise that you gofor acrylic ones. In other words not the wood mounted ones. This is especially important if you are planning on investing in some alphabet stamps.

The reason...

...because you can see precisely "where" you are about to stamp your image in comparison to other things around it because your mount is transparent. And because you can create a word straight onto the stamping block and test it out before stamping the real thing, thus allowing for adjustment, creating a stamped word(s) nicely spaced. Also and for some most important... they are a LOT cheaper.

I believe that the days of wood mounted stamps are severely numbered.

Tuesday, September 18, 2007

Ah! Holiday Scrapbooks

Now there's an event... hopefully a regular one... which is an event in itself, they usually inpire many snaps of all those things you don't want to forget and so - by "many" snaps I mean LOADS!

I have found it best to create an album dedicated to that one particular holiday.

Now you are probably thinking... " Gosh I don't want to do a whole 12x12 album just for a week in ... blah blah!"

Well by album - I am actually referring to a Paper Bag Book (PBB)!

If you choose to put together 3 paper bags you end up with front and back covers, plus 5 Double Page Spreads (DPS) and 3 pockets.

Now the covers and the DPSs are straight forward enough - just 6x6" pages, but in a PBB it's the pockets which are of particular use, and that's because of the the "stuff" you can get into each pocket.

You can get a number journaling cards/tags in one pocket, thus allowing plenty of room, if you have lots to say. Or of course, you can include yet more photographs.

I will post photos shortly - but in a recent holiday PBB, I placed a pocket on one of the journaling cards into which I "stored" about 8 6x4" photos. They are just "as is" and, if I want to, I can journal on the back of the photos too!

TIP: if you do write on the back of your photos with a biro, it is worth sticking or slipping thin paper between each as atmospherics can make the ink mark the photo beneath. Either that or use a proper photograph marker.

I quite often make up a PBB (or any other type of album with pockets) and leave the journaling tag/cards/inserts (whatever you wish to call them) blank for my journaling later.

Try not to get too caught up with journaling as you go along, if you think of things to say as you make up your page layouts, then by all means, write some notes to remind you, but it is worth leaving the 'full on' journaling till the end.

And if you have "oodles" to say - maybe you wrote a diary whilst you were away - then try typing it into your computer, printing it out smaller than usual (say 9pt instead of the usual 11 or 12pt) and fold the paper into a neat package, tie it with a ribbon and adhere that to one of your cards.

It is surprising just how much journaling you can get int a small space when you try!

Sunday, September 16, 2007

Scrapbooking TIP - getting started when you have LOADS of photos to scrap

Well I was hoping that I would be able to post the completed mini album that I used as a demonstration at the ScrapBuddies Crop yesterday, but I was so busy teaching - which I love to do by the way - that I didn't get to finish sticking it all together.

Normally I would just post it a bit later, but I am off to sunnier climbs for a week now and as I may not have suitable access to the internet, I may well not be able to post here again for a few days now!

However, as soon as everything "scrapbooking" is finished I will post it here first! If I can't have exclusivity on my own blog... where can I have it?!

However, before I go I will give you a TIP...

I have often heard the groan "Oh I have SO many photos to scrap, that I just can't keep track of it all".

Now that to me means "I am feeling overwhelmed by my own unreasonable targets to scrap everything". Everybody gets overwhelmed to the point of inaction, they just don't know where to start.

My advice... Stop telling yourself that you HAVE to scrapbook everything. As an example, if you have a load of photographs from a birthday party, don't think you have to have every single one on a layout. Nor should you worry that you haven't Incorporated them all.

Scrap your favourites, it may only be one large one from the party. That's ok, with the other photographs... you can do one of the following:

1. make a concertina album and place a small pictures onto each of its pages, tie a ribbon around it and adhere it to your layout.

2. place all the unused photos into a suitable pocket/envelope and stick that to the page (OR) stick it to the back of your layout just for storage.

You can always go back at some later date and put more pictures onto more scrapbooking pages, but at least you have some sort of part of the event (or just a set of photos) that has a layout.

I guarantee you will feel better, knowing you have done something rather than nothing because of how daunting it all seemed!

The photograph shows an open concertina booklet on a layout. The photos were'nt good ennough on their own, but together and small they make a good interactive feature to the page.

Friday, September 14, 2007

A little bit more organised - scrapbooking mini album

Mini albums are great for scrapping an entire "mini" event! Something like a day out or just spending time with someone, friends, relatives, etc.


They are also great for a single subject - such as Valentine - a like or dislike (if you're feeling grumpy!!).
Most of all they are fun to make and easy. Although you can still get wrapped up in what papers, or colours or whatever to use, once you have the general idea of colours and papers, just search out all sorts of embellishments and put them on a tray beside you.
Then with all your pages (ie your backgrounds) laid out in front of you, you can start to roughly place your pictures and embellishments. It's a litle like a jigsaw... you move bits and pieces around until they just fit!
Here is a photo of my preparation for my demonstration tomorrow - a bit neater than the last one a few posts back!
Nothing is stuck down, just laid on so I can still move it around if it looks better elsewhere.
One tip... try to find a large piece of white paper to work on, or maybe stick some pieces together to make a large white mat!
Although my desk is a very pale cream (I believe the paint was called "Hessian" ooh er!) it is amazing how much influence it can have on a layout!
And I can't emphasize enough about using a daylight bulb in your desk lamp... and yes... you should be using a desk lamp!

Tuesday, September 11, 2007

How to make a dodgy photo look great!

Alright, we have all had them... rubbish photos we have to use for one reason or another.

Sometimes you can end up with a photograph of someone (including yourself) which is a really nice picture if it weren't for the fact that it's a bit blurred or out of focus. Or the portrait is of the whole body and you just want a head and shoulders shot, but when you up the size of the photo, the quality starts to break up (pixelate).

Well there is a solution to those problems.

The fuzziness is less obvious when you change the picture to black and white for a start. But - and this is main bit...

Up the contrast in the picture quite a lot, this can still be done in something like Word, because the program will allow you to slightly fiddle with the settings of the picture, like change it to black and white and fiddle with contrast and brightness.

As you increase the contrast it "whites" out a lot of the imperfections. Also you can use a filter on it to deliberately fuzz (soften) the image. This though has to be done in a photo manipluation program.

The 2 examples - sorry it's my "mug" again - show (TOP) the result of "fiddling" with the original photograph (below). The original was cropped from a fairly low res picture and so was fuzzy when increasing the size, but it was the only picture of me not grinning my head off!

I did use Photoshop Elements in the end to get rid of the background.. I wanted a moody, mysterious feel (it's to go on a particular layout) But I changed the picture to B&W, then increased the contrast, and then used a filter [Filter menu - Distort - Diffuse Glow] which enhances the picture no end!

But just B&W and increased contrast will do a good job.

Sunday, September 09, 2007

What a Mess - preparation for a crop

Well, this is a picture of my neat and tidy desk!!! NOT!

Thought I might as well show you my preparation table. I have a demo to do at the ScrapBuddies Crop this Saturday and my demo is about how to make a mini book. It is based on the Valentine one I made for my husband. You can just make it out in the middle of the picture.


The subject of the demonstration mini book is my daughter and her cousins all washing my car together!


You can see that I have printed out a whole A4 page of little photos. I explained how to do this in the post about Scrapbooking Ourselves - printing photographs.


I am currently in the process of gathering a selection of ribbons, embellishments and other bits and pieces, which I could protentially use in my mini album. In that way I basically make myself up a little kit of co-orinating items. I may well not use them all and I only get out a sample (ie a couple of brads) so that it reminds me what I have, I can always go to my stash to collect some more when I am putting it all together.


Advise I would give to anyone going to a crop, even if not demonstrating. Make a collection of items or yourself for a particular layout. That way you can use the crop time for scrapping and not trawling through your stash looking for inspiration!

Saturday, September 08, 2007

Scrapbook Journaling – What about the future?

Most people think of Scrapbooking as a way of preserving memories. And for the most part this is what most people create albums for.

But there is so much more to it.

We often get hung up on the aesthetics of pages and it becomes all about the photographs. But what about the journaling, eh?

Now I know for a fact that a lot of people groan when you mention journaling because they don’t know what to write or they don’t like their handwriting, etc.

If you don’t like your handwriting, then print out your journaling, or use hidden journaling under photos of inside envelopes, etc. The example above shows hidden journaling that is tucked behind one of the pictures.

There are lots of ways (or types) of journaling, but one that is not done a lot is scrapbooking your thoughts for the future.

This is ideal to do for your children. You can either not use a photograph at all, or use up some of those pictures of your children or grandchildren of which you have hundreds!!

It is actually quite effective to make use of one of those slightly blurred pictures as it brings an air of wistful thought to the layout.

You can write about your hopes for your children, your values and maybe even your experiences from which you hope they will learn.

A fun way of journaling about the future is to try some predictions! Say what you think your baby/child might be when he/she grows up! You can then compare reality to your layout in 20 years time and see how far off you were… or maybe that you obviously have a sixth sense.

Well us mum’s are supposed to be “all knowing” aren’t we!

Friday, September 07, 2007

Why we should scrapbook ourselves part 4 - Scrapbooking our Love

Now I am aware that in Part 3 of this series I did say that Part 4 would be about a Valentines Mini Book!

Well I will be posting it, I haven’t forgotten! I just need to get around to taking the photos! And I am actually using it by way of a demo item for the next Scrapbuddies crop next weekend – cos they all saw it last time and want to have a go! (Just the mini album bit, you understand, not the valentine bit!! LOL!) That will be in Part 5.

Anyway, this Part 4 is still about scrapbooking yourself, but this time it’s about making a layout that shows your love for someone (or something like a pet or a place).

It is still about you - your likes and dislikes - but it should a positive thing about what you appreciate in others. It doesn’t necessarily have to be about “love”, but it should be a positive feeling. So anything from like, to appreciate about, to really care about, to someone/something you are thankful for… etc.

I have been watching the DVD and reading the book of something called The Secret. It is about the Law of Attraction. Whatever you think and feel about you bring about. There is link to the website at the bottom of this post. I would recommend everybody, even cynics, take a look at this stuff, as I believe it to be helpful even in the smallest way of just getting you to think more positively.

We all know that when we are in a good mood, little troubles don’t seem to stress us out as when we are already wound up and feeling pessimistic.

And one of the best ways to get you in a positive mood is to think about something or someone you like! Now that’s not rocket science, is it? So an album about you, doesn’t just have to be about YOU. It is about YOUR LIFE and appreciating what is good about your life NOW is really important.

Also, your scrapbook can inspire and encourage your family, and friends. And the best way to do this apart from true journaling on your part, is to create layouts that point out the special qualities and talents that you see in them.

In your pages… talk to them, tell them how much you love them, and how special they are, or how grateful you are for them being in your life. Tell them about the good points you see. It doesn’t matter how small, it could be that you just like their hair… doesn’t matter as long as it is a positive feeling.

Be expressive, if you are going to feel embarrassed should the person (who is the focus of the layout) see it then just keep it to one side until you are happy with the idea, but for the purposes of a BOM, don’t hold back. It’s your chance to allow yourself to “feel” these emotions. A BOM is a fantastic way to “give yourself permission” to say how you really feel.

There is also the possibility that a scrapbooking layout about the unique qualities of a certain person could actually be given as a gift – it can help lift them when they aren't feeling so confident about themselves. It is a unique and very special and personal gift.

If you can’t find the words…. Use song lyrics, there are lots out there of things that can be translated to friendship – they are not all about romance!!

So the next time you pick your stash, why not scrap a heartfelt page about your love (or just like) for someone/something.

It can only put you in a good frame of mind!

What Is The Secret

Thursday, September 06, 2007

Sketches for “LOADS” of photos!

We see so many layouts with just one photo on them. And yet we have thousands of photographs just busting to be used. Why do we have to choose just one photo from an event or photo session?

Well the answer is you don’t have to at all.

Of course it is a lot easier to create layouts if you have the ability to print out any size, ie you print using your own computer, but it is just as possible using photographs already printed. That is because you can make the most of all the “slightly dodgy” photos by cropping in really tight to someone’s head and shoulders (for instance) and cut out all the other dross!

You can crop in tight to features, like eyes, on portraits that fill a 6x4 photo, and all these little photos enhance the main one or two photographs on your layout to give a much better overall story.

Of course, if you do print your own straight from your computer – you have the huge flexibility to just print out the whole pictures smaller, but even then it is really worth taking the opportunity to crop pictures in interesting ways.

For instance, you may not believe it, but cropping off a third to half of the face in a portrait picture can been really effective! Try it!

And of course, by layout I mean a single page or a DPS (double page spread). Challenge yourself to scrap all the pictures you took at your child’s/grandchild’s last birthday!

This is the link for some sketches using 10 or more photos on DPS. It’s by Becky Higgins and is on the Creating Keepsakes site.

The page here is only an 8x8, and yet I have managed to get 5 photographs on it. And that was because I wanted to use them all, but they didn’t all warrant pages to themselves, especially as they are all on the same theme.

Wednesday, September 05, 2007

Share - Upload your Scrapbooking Layouts onto the web

Why not share your favourite layout online? Then we can all take a ganders and appreciate all your hard work!


On the Everything ABout Scrapbooking site there is a page where you can upload a picture of your layout.

This is what they say...

Don't hide your favorite scrapbook layouts in your closet. Pull them out and publish them right here at this site!
Let your scrapbook layouts be seen. Give them a second wind. Share your favorites. Inspire other scrapbookers and be inspired.
Once you've published your layout and it's uploaded on this site, you can even invite your family and friends to comment and rate on them!
I wish I have an all-time favorite layout, but I've not found that layout yet. Though I do have a current favorite layout... and it's usually my latest creation! So if you have a hard time choosing among your many favorites, show us your latest favorite.

Everyone has favorites... what's yours? Here's a great place to showcase your favorite layouts! Let others take a look at your favorites. Too many to choose from? How about picking your current favorite? What about your all-time favorite? Then write something about your chosen layout with us.

Get published - even if you do, do it yourself!

Tuesday, September 04, 2007

Out of your Scrapbooking Comfort Zone

Well, today I decided to take on a sketch challenge from Pencillines, it's number 48. I decided to do a layout quickly!

Well it took a little longer than half are hour!! more like one and a half completely from scratch, but it is the colours that is the most important thing here!

Why... well because they are colours which are completely out of my comfort zone! The papers are from Rusty Pickle and they were a free gift from Scrapbook Inspirations magazine and certainly not the type of papers I would purchase.

However, I do believe it is a good exercise to push yourself to use materials and colours you wouldn't normally!

Monday, September 03, 2007

Sketching again

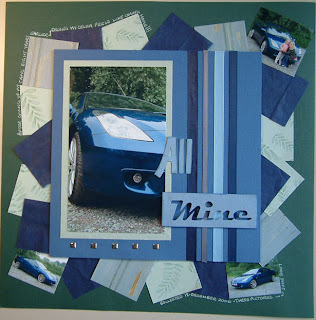
Thought I would show you the actual sketch that I used which came from the Little Book of Sketches website, so that you can compare it to my finished layout.


I thought it would be useful because some people get a bit "hung up" on copying a sketch verbatum and worrying if it is not exactly like the original sketch example.

Although my layout is fairly close to this sketch I have made some changes. For instance the three squares on the top of the photomat appear as 5 square brads on the bottom of my photomat.
The Squiggly lines (like stitching) on this sketch have been translated to straight ribbons on my layout. Now I could say that this was to reflect the angular form of the car...! But in fact it was because I couldn't be bothered to get the sewing machine out!

Also I have used the opportunity to place three smaller pictures around the edge instead of all the small squares being just patterned paper.

I will post some more here shortly of my translation of various sketches and I can thoroughly recommend them as a way of focusing the mind just enough to enable you to get a scrapbooking layout actually finished without getting too sidetracked by form half way through!

Saturday, September 01, 2007

Scrapbooking KISS

I bet you thought I was going to discuss lips!!


Well sorry about that - KISS stands for "Keep It Simple Silly" or in our case - "Keep It Simple Scrappers"!! LOL And in that vein I post my latest layout.

Yes folks 2 whole scrapbooking pages in less that 24hrs! Last night's one about my VW Beetle and tonight's about a landscape upon which I used to gaze from my bedroom window.
The challenge was:
a landscape or seascape
1 or 2 photos only
use green, brown or blue buttons
Hand write the journaling
Use shades of blue, green and brown.

Both were challenges set by my team members on UKScrappers.

Funny how some things just click isn't it?! But the main reason for getting 2 layouts done so quickly was that I kept it simple.

On both layouts, there are no fancy techniques used, just shapes of plain and patterned paper/card, some ribbon, buttons (or a brad) and a bloom... SIMPLE !

And bearing in mind there are so many gorgeous papers out there, we really should leave the hard work to them and build out Scrapbooking layouts in super quick time!